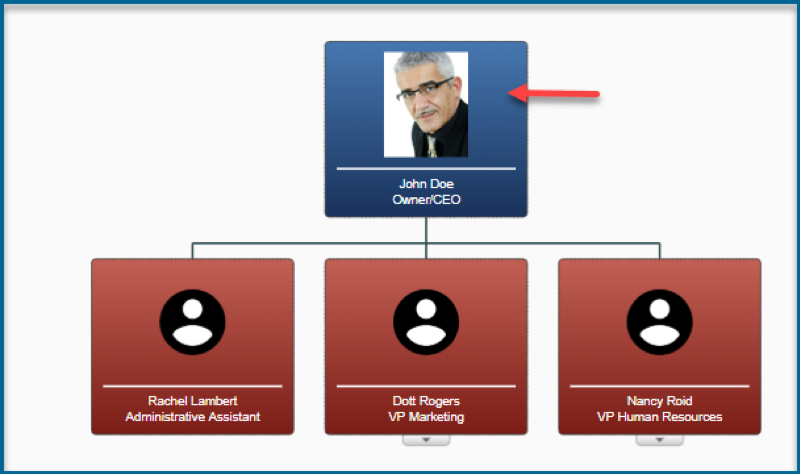
Adding photos to your chart is a four-step process. See below for guidance.
Photo Information:
- Add Column to Data Sheet & Upload sheet to application
- Upload Photos to application
- Map Correct field in application
- Add Photo column (Field) to Views
It’s recommended to name your photos with the employee first and last name or Employee ID.
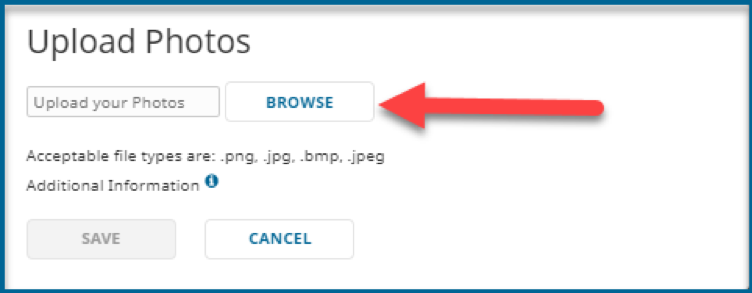
- Acceptable file formats are .png, .jpg, .bmp, and .jpeg.
- File size suggestion: 80×100 Pixel
- Save photos to accessible location.
- Add Column to Data Sheet & Upload sheet to application
- Update your data source –
- Open your Data Sheet
- Add the photo names to the respective employees under “Photo” column.
- Photo assigned in the photo location should match what is on your data sheet. File extensions must be included in photo name.
- Save file

- Upload your updated data source into the application. See updating employee data for more details.
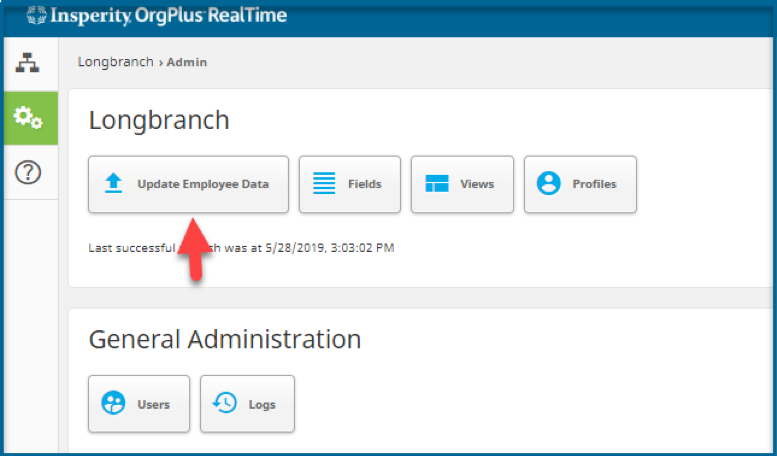
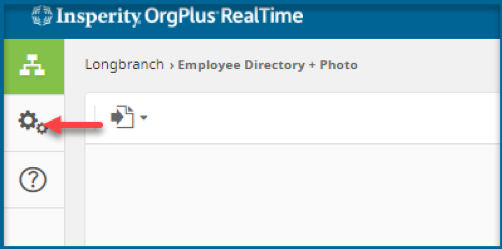
- Click Administration

- Click Update Employee Data
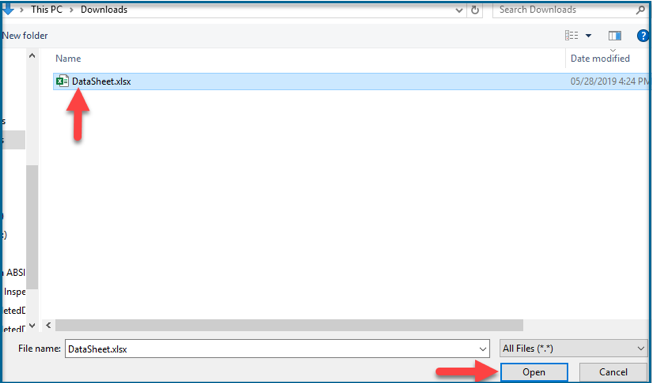
- Browse to data location> Select DataSheet
- Click Open
- Click Administration
- Update your data source –
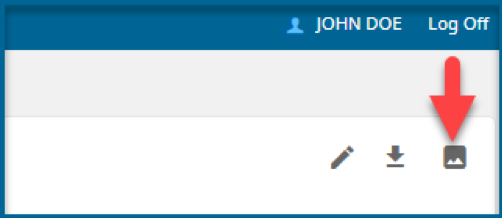
- Upload photos to the application:
- Click Administration

- Click Upload photos icon
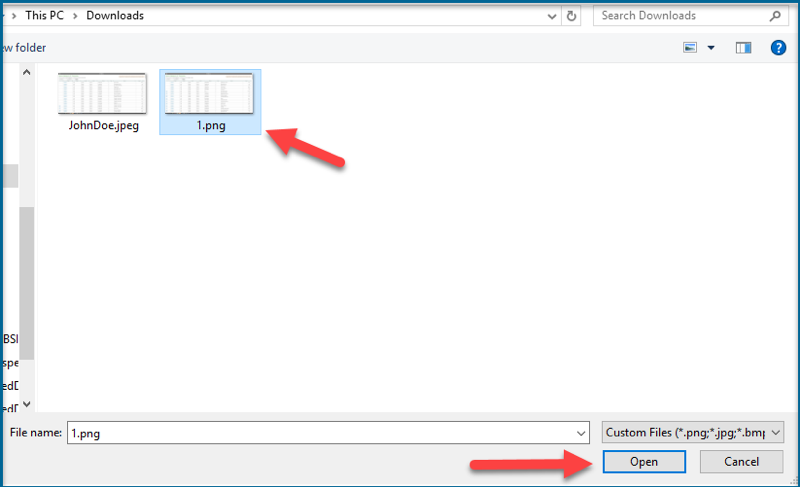
- Click Browse
- Click Open
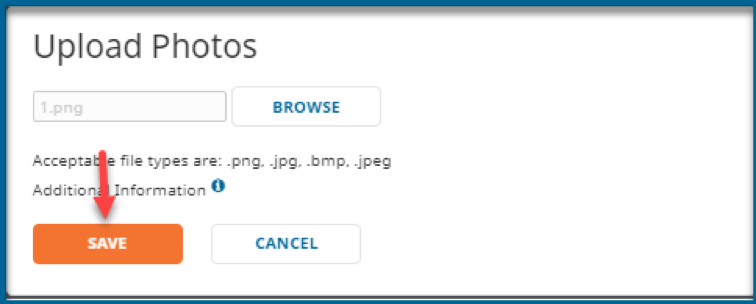
- Click SAVE
- Click Administration
- Map Correct field in application
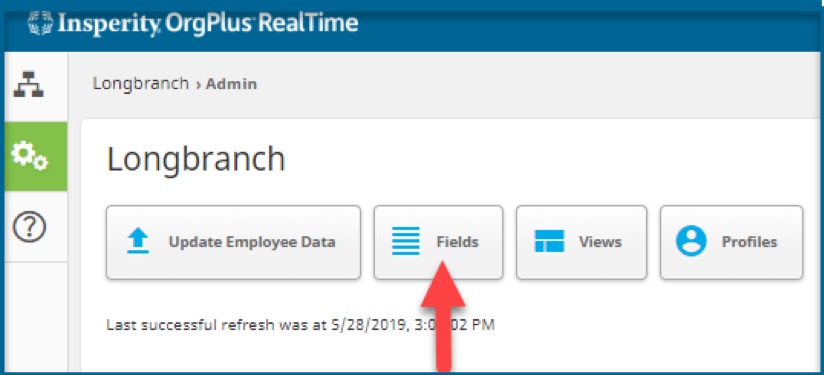
- Click Administration
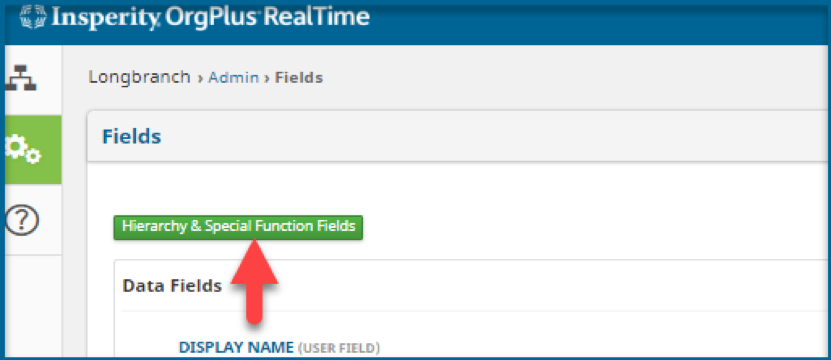
- Click Fields
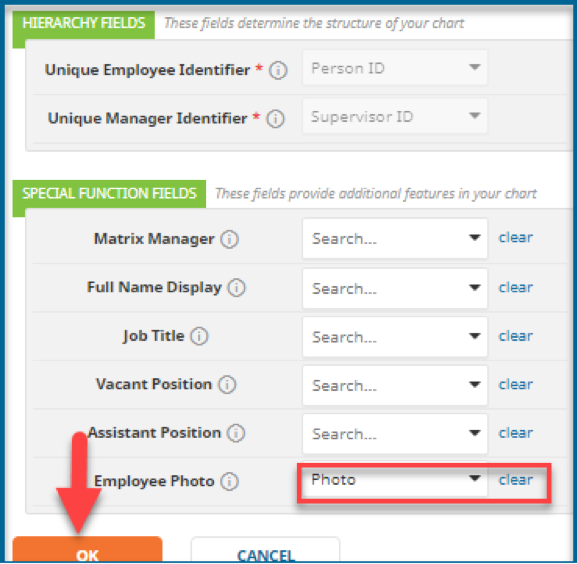
- Click Hierarchy & Special Fields
- Map Employee Photo to the Photo field column in your datasheet
- Press OK
- Click Administration
- Add Photo column (Field) to Views
- Click Administrator

- Click Views > Select from the available view list

- Click Box Types
- Hover over desired box and click EDIT

- Click ADD DATA
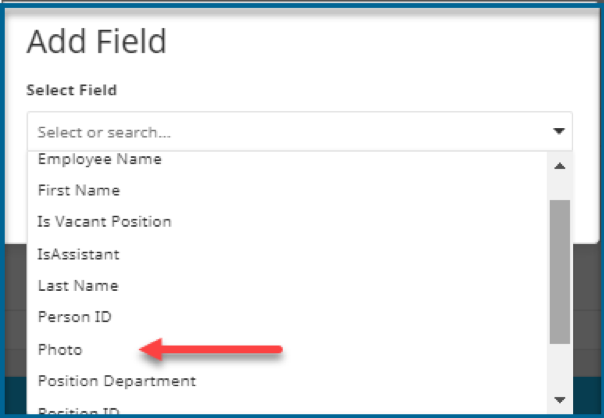
- Select Field
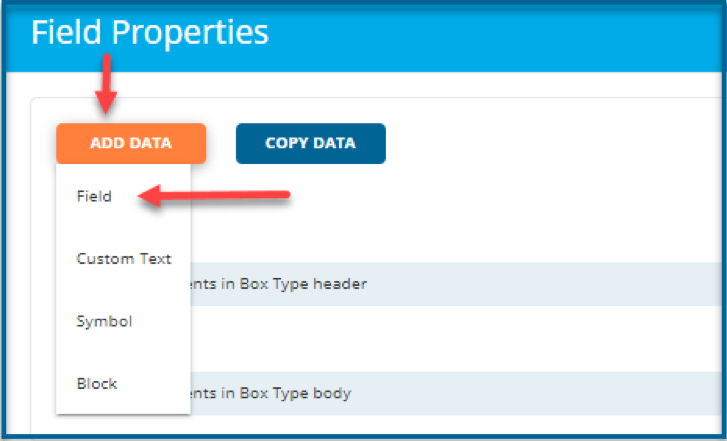
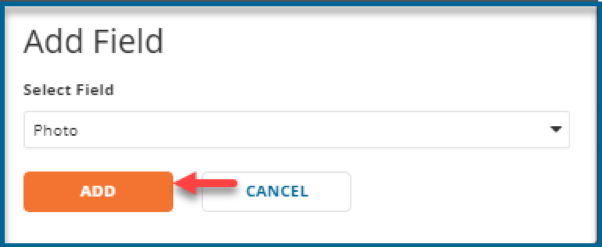
- Select Photo from the fields list
- Click ADD
- Click Administrator
Photos should now populate in the workspace